


Missing a simple and delicious recipe for airy brioche rolls? Look no further. With the Danish weather, it can sometimes be a challenge to work with yeast dough. The weather can affect your baking more than you might think.
Recipe for air brioche rolls
Do you miss an easy and delicious recipe for fluffy buns? Then look here.
With the Danish weather, it can sometimes be a challenge to work with yeast dough.
The weather can affect your baking more than you might expect.
But with this recipe, I promise you that you will succeed in baking fluffy buns – almost every time.
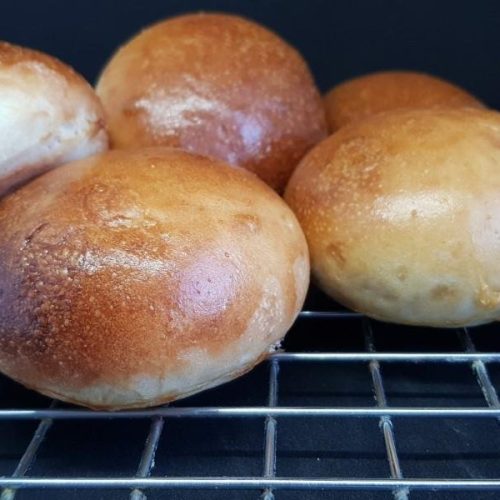
Servings: Pcs
Air Brioche Rolls
Missing a simple and delicious recipe for airy brioche rolls? Look no further. With the Danish weather, it can sometimes be a challenge to work with yeast dough. The weather can affect your baking more than you might think.
Equipment
- Kitchen Scale
- Deciliter Measure
- Bowl
- Hand Mixer (option 1)
- Stand Mixer (option 2)
- Brush
- Oven
Ingredients
- 0.5 package Dry Yeast Or 15g regular yeast
- 12.5 gram Sugar
- 19 gram Coarse salt
- 56 gram Oil Sunflower, canola, or any other neutral tasting oil
- 500 gram Water The water should be lukewarm (preferably 37 degrees Celsius (99 degrees Fahrenheit))
- 850 gram Wheat Flour Hold a bit back for kneading
- 1 pcs. Egg For brushing
Instructions
The Dough:
- Put yeast, sugar, salt, oil, and water in a mixing bowl and dissolve the yeast in the water. If you use a Kenwood mixer like me, give it one minute at speed 3. If you mix by hand, stir until the yeast, salt, and sugar are dissolved – this may take a couple of minutes.
- Gradually add the flour at speed 3, so there isn't flour all over the kitchen.
- Once the dough starts to come together, increase the speed to 5, so the gluten fibers start to work. Keep going until the dough begins to pull away from the sides of the bowl.
- If you mix by hand, knead the dough on a table for about 20-30 minutes until the dough is smooth and pleasant to touch. The dough should be slightly sticky without clinging to your fingers.
- First rise:Set the dough to rise in a bowl covered with a shower cap* (nab them from the bathroom the next time you or your family stay at a hotel) or use plastic wrap.Let the dough rise for 2 hours at room temperature.
Shaping the rolls:
- Turn the dough out onto a floured surface and divide it into 10 pieces without knocking the air out of the dough.
- Shape the dough into tight rolls and place them well apart on two baking trays.
- Let the rolls proof under a tea towel for 30 minutes. This will dry the surface a bit.
For Brushing:
- Beat an egg well and brush each roll with a bit of egg so the entire surface is covered with a thin layer of egg. Brush them right before they go into the oven.
- Bake the rolls in a preheated oven at 210 degrees Celsius (410 degrees Fahrenheit) (fan) for 10 minutes.
- Cool the rolls on a wire rack.
Notes
*The advantage of using a shower cap when baking yeast dough is that, unlike plastic wrap or a tea towel, the shower cap allows the dough/yeast to work with the warm air, keeping the dough moist in just the right way.
Plastic wrap is a good alternative to a shower cap, though it doesn't provide the same conditions for the dough, but it is much better than a tea towel.
Tea towels are very good for the second rise, when the rolls or bread are shaped, and we now want the dough to dry out a bit on the surface, as opposed to before when we wanted to retain moisture in the dough.
** If the rolls are brushed too early, there's a risk that the egg will form a layer of scrambled egg on top of your rolls.
*** Bake only one tray of rolls at a time and place the baking tray on the bottom rack.
Plastic wrap is a good alternative to a shower cap, though it doesn't provide the same conditions for the dough, but it is much better than a tea towel.
Tea towels are very good for the second rise, when the rolls or bread are shaped, and we now want the dough to dry out a bit on the surface, as opposed to before when we wanted to retain moisture in the dough.
** If the rolls are brushed too early, there's a risk that the egg will form a layer of scrambled egg on top of your rolls.
*** Bake only one tray of rolls at a time and place the baking tray on the bottom rack.