
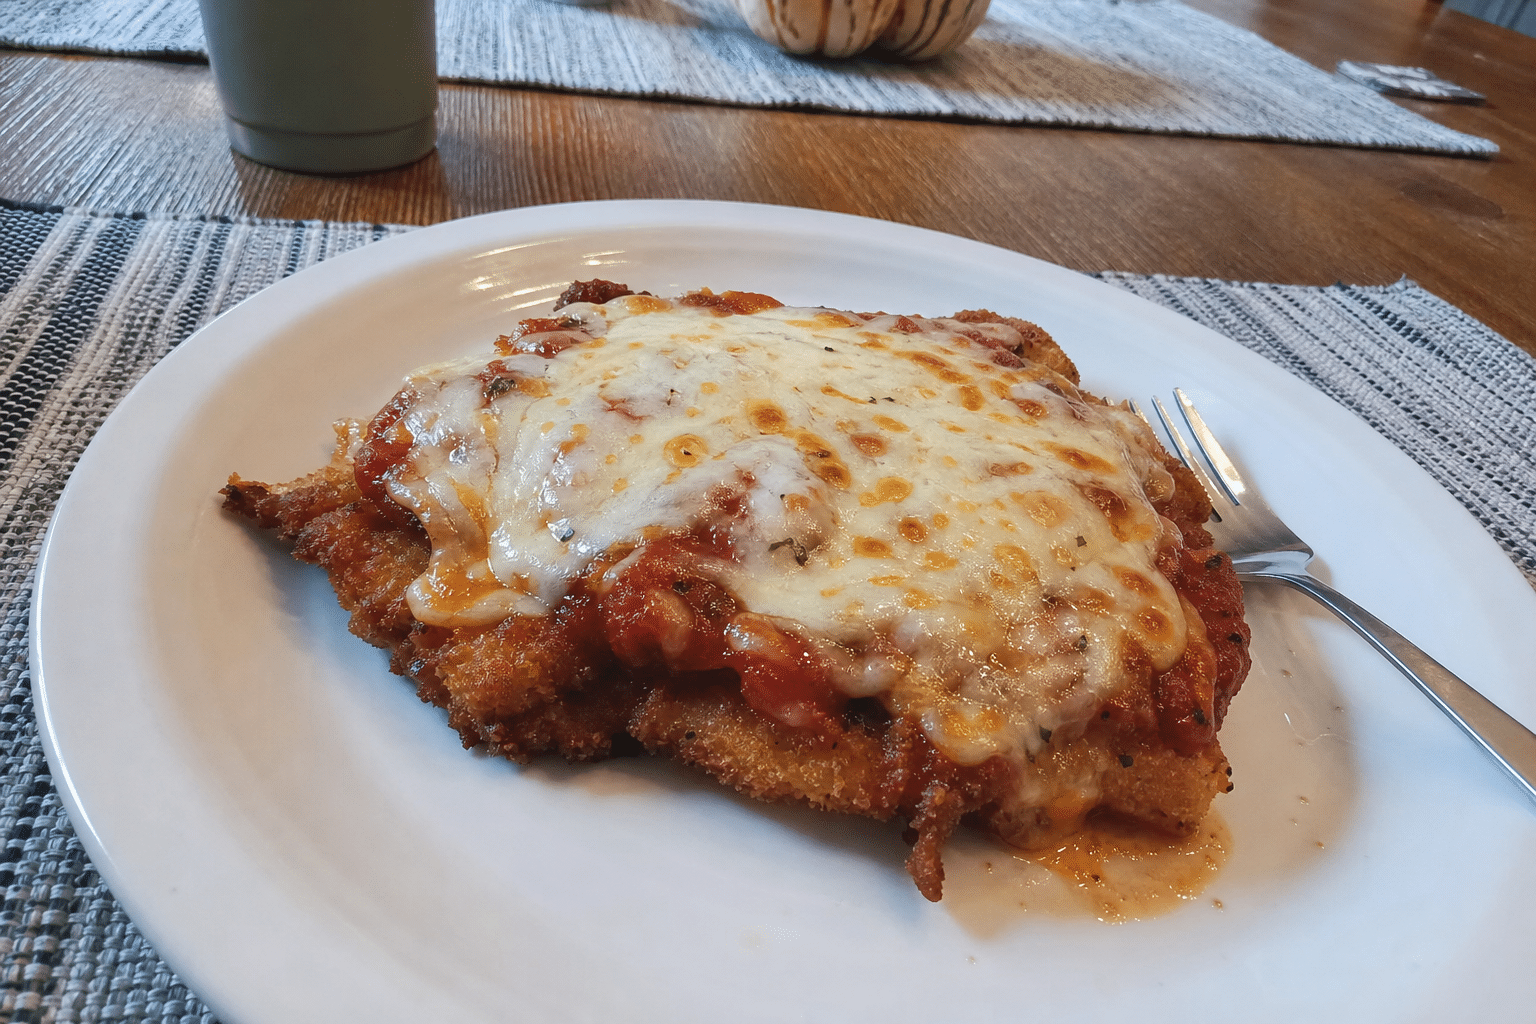

Restaurant chicken parmesan rarely lives up to its price tag. The crust is soggy, the chicken is dry, and the sauce-to-breading ratio is off. This recipe fixes all of that with a few specific technique adjustments that any home cook can follow.
The result: a deeply golden, still-crispy crust under the cheese, chicken that hits exactly the right internal temperature, and just enough sauce to taste without drowning the breading. Start to table in about 45 minutes.
Why this recipe works
The two things that reliably ruin chicken parmesan are both avoidable.
Soggy crust. This happens when sauce steams the edges of the breading during the oven finish. The fix is simple – sauce only the center of each cutlet, leaving a 1/2-inch (1.3 cm) border around the edges. The uncovered breading stays crispy while the cheese melts over the sauced center.
Dry chicken. Boneless breasts vary dramatically in thickness, so the thinner end overcooks while the thicker end finishes. Pounding to an even 3/4-inch (2 cm) thickness before breading means the whole cutlet cooks at the same rate. Pull the chicken as soon as it hits 165°F (74°C), and it stays consistently juicy.
The third lever is the breading itself. Seasoning each stage separately – the flour, the egg wash, and the breadcrumbs – builds flavor throughout the crust, not just on the surface.
Read more: How to make Roman carbonara without cream, and why it works
Ingredients
Serves 2 to 4
For the chicken:
- 2 large boneless, skinless chicken breasts (about 1 lb / 450 g total)
- 1/2 cup (65 g) all-purpose flour
- 2 large eggs
- 2 tablespoons whole milk or water
- 1 cup (55 g) plain breadcrumbs or panko
- 1/4 cup (25 g) finely grated Parmesan, for the breading
- 1 teaspoon garlic powder
- 1 teaspoon dried Italian seasoning
- 1 teaspoon kosher salt, divided
- 1/2 teaspoon black pepper, divided
- 1/2 cup (120 ml) neutral oil (vegetable, canola, or grapeseed), for frying
For finishing:
- 3/4 cup (180 ml) marinara sauce
- 4 oz (115 g) fresh mozzarella, sliced, or 1 cup (115 g) shredded low-moisture mozzarella
- 3 tablespoons finely grated Parmesan
- Fresh basil leaves, for serving (optional)
Instructions
1. Heat the oven to 400°F (205°C). Set a wire rack inside a rimmed baking sheet and set aside.
2. Place each chicken breast inside a zip-lock bag or between two sheets of plastic wrap. Pound to an even 3/4-inch (2 cm) thickness using a meat mallet or rolling pin. If a breast is especially large, slice it in half horizontally before pounding so the cutlets stay a manageable size. Pat both sides completely dry with paper towels – surface moisture prevents the crust from browning and causes it to steam instead of fry.
3. Set up three breading stations in a row: a shallow dish with the flour, 1/2 teaspoon of the salt, and 1/4 teaspoon of the pepper; a bowl with the eggs beaten together with the milk; and a shallow dish with the breadcrumbs, 1/4 cup Parmesan, garlic powder, Italian seasoning, remaining 1/2 teaspoon salt, and remaining 1/4 teaspoon pepper stirred together.
4. Working one cutlet at a time, coat it in the flour and shake off the excess – a thin, even coat is what you want. Dip it in the egg and let the excess drip off. Press it firmly into the breadcrumb mixture, turning to coat both sides. Set on a clean plate. For the crispiest result, rest the breaded cutlets uncovered in the refrigerator for 15 to 30 minutes before frying; this helps the coating set.
Read more: Eggs Benedict at home: the hollandaise technique that makes it easy
5. Pour the oil into a large, heavy skillet (cast iron or stainless steel) to a depth of about 1/4 inch (6 mm). Heat over medium to medium-high until the oil reaches 350°F (175°C) – a pinch of breadcrumbs dropped in should sizzle actively but not violently. Working in batches, never crowding the pan, fry each cutlet until deep golden brown and firmly set, about 3 to 4 minutes per side. Transfer to the wire rack as each batch finishes.
6. Spoon 2 to 3 tablespoons of marinara sauce over the center of each cutlet, leaving the outer 1/2 inch (1.3 cm) of breading bare. Lay mozzarella slices over the sauce, then scatter the remaining 3 tablespoons of Parmesan on top.
7. Bake until the cheese is fully melted and bubbling and the chicken registers 165°F (74°C) at the thickest point on an instant-read thermometer, 10 to 12 minutes. Rest for 2 minutes, then scatter fresh basil leaves over the top if using.
Tips and variations
Oil temperature matters more than burner setting. Oil that is too cool makes the crust absorb fat before it crisps; too hot and the breadcrumbs burn before the coating sets. A fry thermometer keeps it in the right range throughout.
Read more: Masoor dal with coconut milk: the creamy Indian red lentil curry ready in about an hour
Panko vs. regular breadcrumbs. Panko gives a lighter, crunchier texture. Regular breadcrumbs give a denser, more traditional result. Both work well; panko is slightly more forgiving if the finished cutlet sits for a few minutes before you serve it.
Cheese options. Fresh mozzarella melts beautifully but releases water, which can soften the top of the crust. Low-moisture mozzarella stays drier and gives a stretchier, more uniform melt. Provolone is a solid alternative with a slightly sharper flavor.
Gluten-free. Swap the all-purpose flour for rice flour or a gluten-free all-purpose blend, and use gluten-free breadcrumbs. The technique is identical.
Make-ahead. Bread the cutlets and refrigerate uncovered up to 4 hours ahead – the exposed surface dries slightly, which actually improves the crust. Fry and bake just before serving. Leftovers keep refrigerated for up to 3 days; reheat on a wire rack in a 350°F (175°C) oven for about 10 minutes to restore some crispiness.
Scaling up. For 4 breasts, fry in three batches rather than crowding the pan. Keep finished batches warm on the wire rack in a 200°F (93°C) oven while the rest catch up.