Pan-seared lamb tenderloin is a delicious delicacy. However, the biggest problem is that the tenderloin of the lamb is very small, so it is best suited for an appetizer unless you buy quite a few to get full.

Recipe for lamb tenderloin
Quick-seared lamb tenderloin is a delicious delicacy. The biggest problem, however, is that lamb tenderloins are very small, so they are best suited for an appetizer, as you would otherwise need to buy quite a few to get full.
I prefer that they just kiss a scorching hot pan or grill, and I am sharing my favorite way to cook them here.

Servings: persons
Lamb Tenderloin
Pan-seared lamb tenderloin is a delicious delicacy. However, the biggest problem is that the tenderloin of the lamb is very small, so it is best suited for an appetizer unless you buy quite a few to get full.
Ingredients
- 4 pcs. Lamb Tenderloin
- Pepper From the Grinder
- Ghee Or a mixture of butter and oil
- Flake Salt
Instructions
- One of the most important things when cooking meat is not to take it out of the fridge 2 minutes before cooking.
- If you do that, there is a high chance that the large temperature difference between the cold meat from the fridge and the hot pan will lower the pan's temperature too much, preventing the desired heat on the meat. In other words, the meat will "boil" instead of getting a sear.
- Therefore, it is important to take it out of the fridge 30 minutes before cooking and just let it sit on the kitchen counter.
- Dry the meat well before putting it on the pan, I usually use paper towels for that.
- Season the meat with pepper from the grinder and press your tenderloin slightly flat, so you "only" have two sides to cook on. If it is round, it requires you to cook on four sides, and it is almost impossible to get a sear without overcooking it.
- Turn your pan on maximum heat. If you "only" have a Teflon pan, I recommend using a grill instead, as they cannot withstand the heat. If it ends up on the grill, it's a very good idea to brush the meat with oil, as it helps to quickly transfer the heat to the meat.
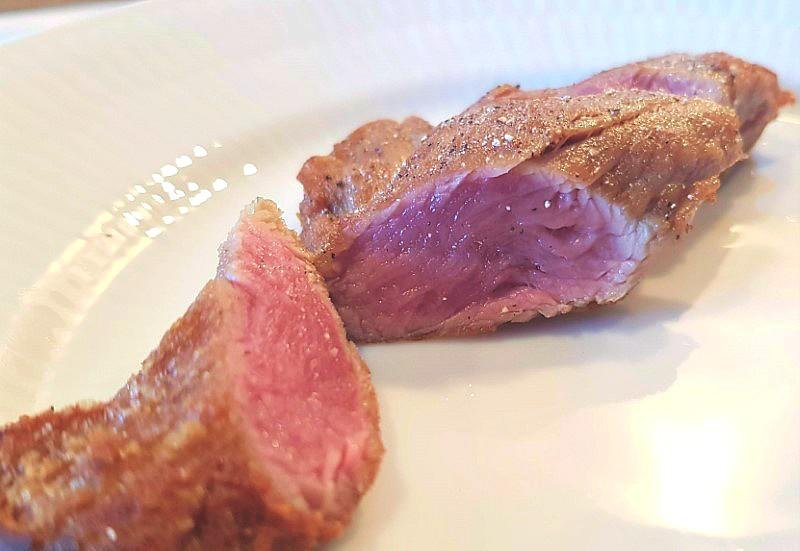
- I don't think lamb should be overcooked, as it becomes very boring if there's no color left.
- The tenderloin is the most tender cut of the lamb, so it only requires a sear and heat all the way through to become perfect.
- If you have ghee (clarified butter), then it is (in my opinion) preferable when cooking lamb tenderloin.
- Place the meat on the pan and give it 60 seconds before turning it.
- Give it another 60 seconds on the other side, then take it off the pan and let it rest for 3-4 minutes on a plate.
- Cut the meat into thin diagonal slices and sprinkle some good flaky salt over it.
- Bon appétit.
Notes
The meat I used for this recipe came from a lamb that was dry-aged for 60 days.
When dry-aging, there is less moisture left in the meat, so it is even more important than with the usual "wet-aged" meat that it is not overcooked, as it is more prone to becoming dry.
When dry-aging, there is less moisture left in the meat, so it is even more important than with the usual "wet-aged" meat that it is not overcooked, as it is more prone to becoming dry.