
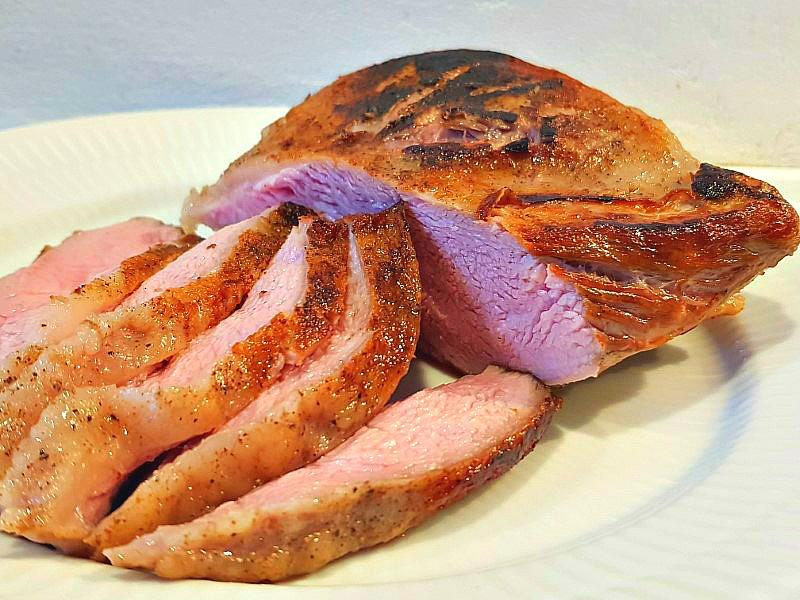

Recipe for veal culotte sous vide
A really easy and delicious recipe for sous vide veal rump. If there’s one thing Danes love to serve when they have guests for dinner, it’s a rump roast!
It’s a fairly safe choice, and you rarely offend anyone by putting one of these on the dinner table.
Veal rump is not the cheapest meat, so it’s clear that you want to get the absolute best out of the preparation. Fortunately, you’ve come to the right place! Here, I will guide you to the most perfect veal rump in sous vide. I will go through the recommended times and temperatures, and I will also show you how to carve the veal rump afterwards, as it can be a bit tricky.
The difference between veal cuvette and veal rump
It’s not surprising that at first glance, you might mistake one for the other. They both have the characteristic triangular shape, but that’s where the comparison ends.
The cuvette is cut from the front of the thigh. It’s a muscle that’s used a lot, so it contains quite a bit more connective tissue than muscles that aren’t used as much. The more connective tissue, the more tenderizing it requires to make the meat deliciously tender. The cuvette is somewhat cheaper than the rump. That it might have more flavor than the rump is another story altogether.
The rump is cut from the rear part of the animal’s back, just before the tail. The muscles here are used to a much lesser extent than, for instance, the cuvette, making the rump much more tender. This is also why most consider the rump to be a better cut than the cuvette.
Preparation of veal rump
We can probably all agree that a veal rump should be tender and pink. At least tender! There are a few who prefer their meat well-done, and of course, there’s room for that as well. However, most of us would agree that it can have a bit of color.
When we prepare veal rump in the traditional way, it typically goes in the oven. The cooking time depends on the size of the rump, but a roast of one kilo usually needs about 25 minutes at 180 degrees Celsius with fan.
The cooking time is roughly the same on the grill, over indirect heat.
The challenge with the veal rump is that the cut is not evenly thick throughout. This means you can quickly end up cooking the roast unevenly.
By using sous vide, the entire veal rump will get perfectly and evenly cooked throughout – from the inside out!
Veal rump sous vide
When you cook veal rump in sous vide, the roast becomes even more tender and juicy than if you made it in the oven or on the grill.
Another advantage of sous vide is that you don’t need to keep a sharp eye on the clock. It doesn’t really matter if the roast gets an extra half hour since it can never get hotter than the water temperature. So you can relax and enjoy spending time with your guests.
You also don’t need to monitor the temperature – you’ve already set it beforehand.
The great thing about sous vide is that you can prepare the veal rump several days in advance (if that’s easier for you for some reason). When the roast comes out of the water bath, just put it directly into a basin of ice-cold water to cool it down quickly (still in the bag). After that, put it in the fridge. When it’s time to serve, place it in a basin/pot/bucket with warm water, and after about an hour, it’s warm. Then just give it a sear, and it’s ready to serve.
Veal rump sous vide time and temperature
The only thing that matters when you use sous vide is time and water temperature. The time depends a lot on the quality and thickness of the meat, which can vary from time to time.
I always go to my butcher for meat, and the quality here is much higher than what you find in the supermarket’s refrigerated section. High-quality meat needs a bit less time, but if you’re unsure about the quality of your veal rump, I recommend giving it a bit more time than I give mine.
As for the water temperature, it largely depends on your (and your guests’) personal preference. If you, like me, prefer your meat medium rare, you should stick to a temperature range of 53-55 degrees Celsius. For rare, go down to 49-52 degrees. If you want the meat medium, i.e., a bit less red than mine, the temperature should be 56-59 degrees, and for well done, go all the way up to 60-64 degrees.
Veal rump sous vide searing and resting time
One of the things about sous vide is that we need to add a sear after the water bath. When working with sous vide, the food will never be piping hot inside, but that’s not really a big deal. Instead, we get perfectly cooked meat every single time.
You can add a sear in various ways. You could use a grill pan/frying pan, a blowtorch, or a grill. I usually use my frying pan and always sear in ghee. If you don’t have ghee, you can also use a mix of oil and butter.
Once the veal rump has its sear, it’s ready to be carved immediately. You don’t need to let it rest beforehand.
Carving the veal rump
You should always carve the roast against the grain, but the challenge with the veal rump is that the fibers don’t run in just one direction.
Look here:
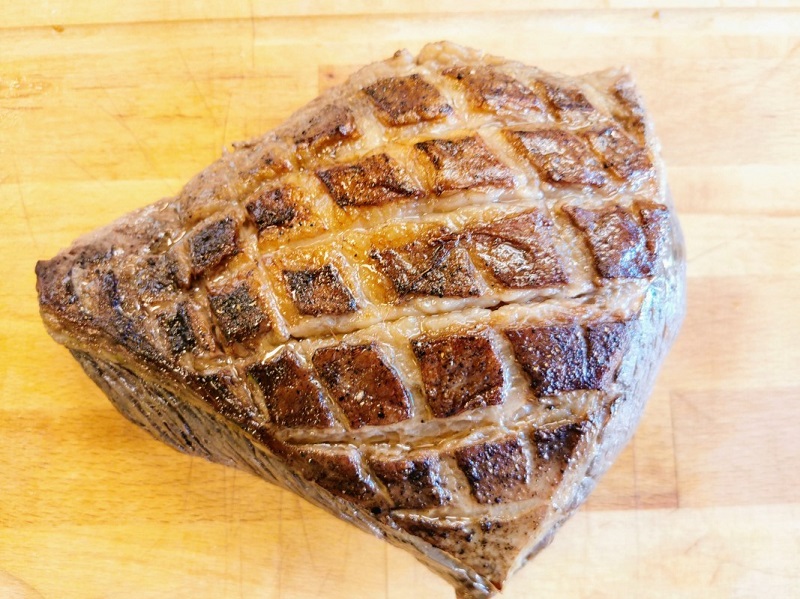
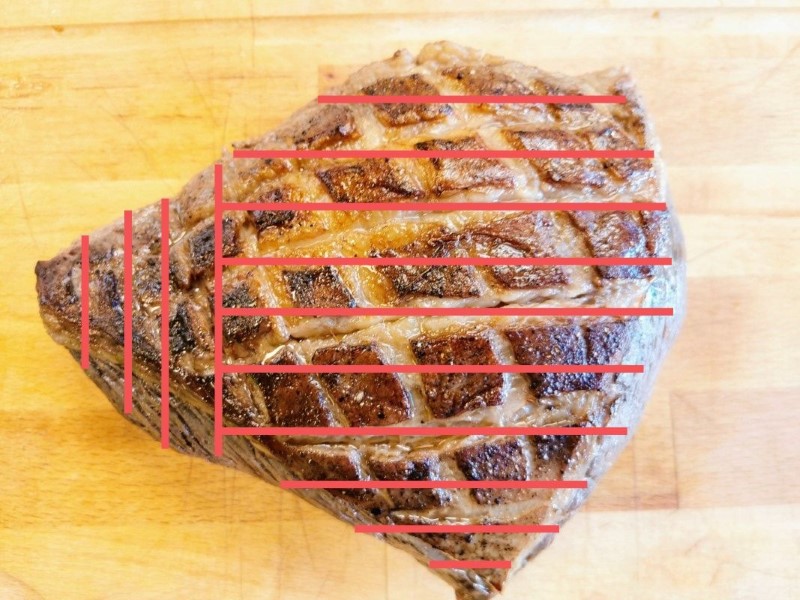
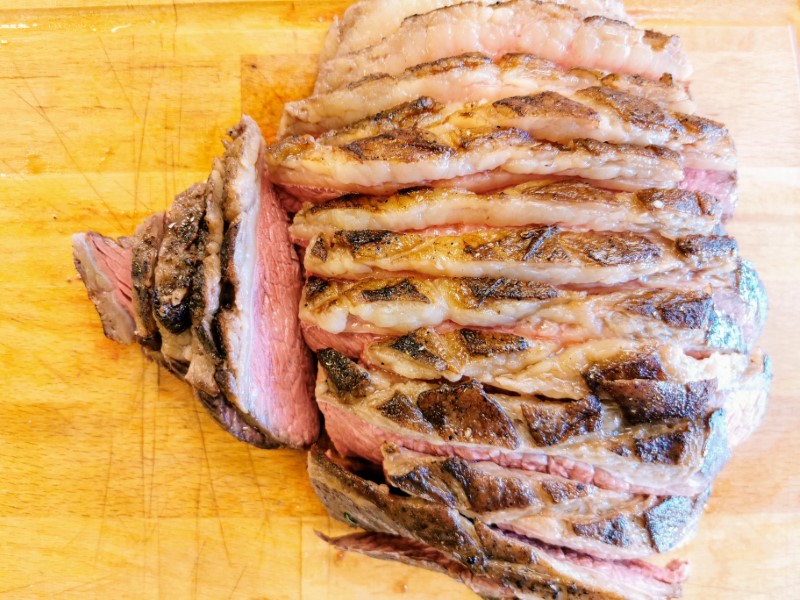
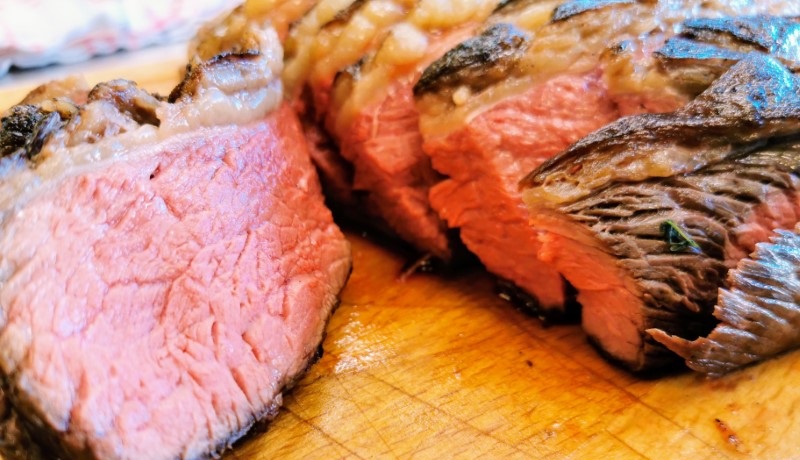
Start by slicing the “pointed” end. Then turn the roast 90 degrees and carve the rest. It may vary slightly from time to time, so a good idea is to start with a test: cut a single slice and look at the meat before proceeding.
The cut surface should look somewhat like this:
Side dishes for veal rump sous vide
There are many things that go really well with veal rump. Bearnaise sauce and potatoes, perhaps with a green salad, are always a safe bet. You might also try a crispy cabbage salad and baked stuffed potatoes.
If it’s mushroom season, you could make a creamy sauce using mushrooms like champignons, king oyster mushrooms, and oyster mushrooms.
If it’s grilling weather, you can make whole grilled corn on the cob, especially if you’re planning to give the veal rump a turn on the grill after the water bath. A cold potato salad is always a good addition to the grill spread. If the weather’s not good for grilling, you can also make corn on the cob using sous vide.
Tip: If there’s any veal rump left over, it can be used in pita bread the next day!
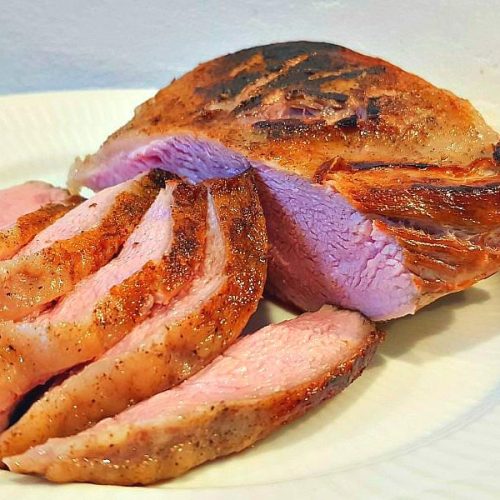
Veal Culotte Sous Vide
Equipment
- Sous Vide
- Pre-Slicing Knife
- Frying Pan Optional
- Grill Optional
- Gas Burner Optional
Ingredients
- 800 gram Veal Culotte
- Pepper From the grinder
- Salt
- Ghee For roasting. Can be substituted with butter or oil
Instructions
- Start by checking your meat for any large fat lumps and trim them off. If you want to help yourself, score the fat in the way you want to carve the roast afterwards. It's a bit easier to see the meat fibers while the meat is still raw.
- Season the veal culotte with salt and pepper on both sides.
- Place the meat in a vacuum bag and vacuum seal it.
- Pour warm water into your sous vide machine (to shorten the heating time) and set the temperature to 55.5 degrees Celsius (41 degrees Fahrenheit).
- Place the meat in the water bath and let it cook for 5 hours. If you're uncertain about the quality of your veal culotte, for example if you found it in the supermarket's cold counter, give it an extra hour.
- Take the meat out of the water bath and cut open the bag.
- Pour off the liquid and save it preferably for a good sauce.
- Pat the meat dry, either with a clean tea towel or a piece of kitchen paper.
- Now the meat needs a crust, and you can achieve that using various methods:
Grill pan/frying pan with ghee:
- Heat the pan to full blast. When it's smoking hot, add ghee to the pan, and sear the meat for 30 seconds on each side.
Grill pan/frying pan with oil/butter:
- Heat the pan to full blast. When it's smoking hot, add oil to the pan. When the meat is placed on the pan, add butter. Let the meat sear for 30 seconds on each side.
Grill:
- The grill should be as hot as possible. Place the meat fat side down and sear it first for 30 seconds on one side followed by 30 seconds on the other side.
Blowtorch:
- Place the meat in an ovenproof dish or on a plate and hold the blowtorch 10 centimeters away from the meat. When the meat starts to get a crust, move the blowtorch until the entire surface has a crust. The advantage of using a blowtorch is that you can get a crust everywhere, unlike when using a grill/pan.
Serving
- Carve the meat into thin slices as directed and sprinkle a good flake salt on top.