

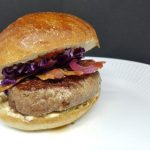
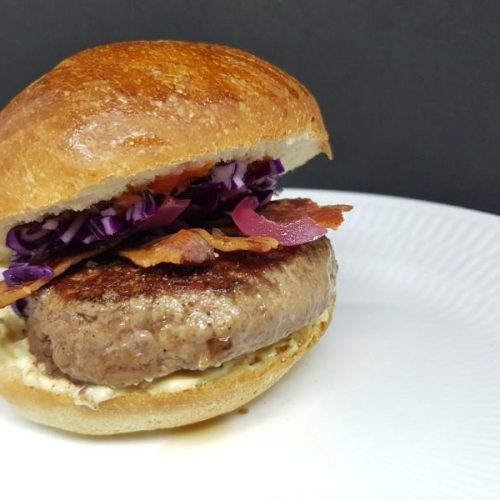
Recipe for burger with truffle mayo
A homemade burger, that’s just something that works. Serve it in a homemade bun spread with homemade truffle mayo, a bit of ketchup, ultra-crispy bacon, and crunchy red cabbage, and there aren’t many hot dog stands that can keep up!
Personally, I prefer putting cabbage rather than lettuce in my burger, as it gives a better bite and crunch, but of course, that’s a matter of taste 😉
As for bacon, there’s naturally no shame in using the standard store-bought bacon. However, nothing can quite match homemade smoked bacon, so I often make it myself. If you’re up for it, there’s no excuse not to! Here, you can read about how to cold-smoke your own bacon and how to make your own little “smokehouse” from an IKEA trash can.
And then there’s the burger patty… There really shouldn’t be many obstacles to frying a good burger patty, but in my experience, preparing a good, juicy burger does require having a few tricks up your sleeve.
For example, it’s a really good idea to take the meat out of the fridge 30 minutes before frying. If you place the cold patty on the hot pan, the juices will run out of the meat – and you’ll end up with a boiled patty instead of one with a delicious crust.
When you’re in the supermarket, this is not the time to be too afraid of fat. Trying to use ground meat with only 4-7% fat content to make a juicy burger just won’t work.
I always use 8-12%. This way, the patty stays juicy, flavorful, and I don’t need to add extra fat for frying, and the fat content is still low enough to maintain a genuine meat flavor and texture.
It’s a bit tedious to make homemade mayo just for 2 burgers, so you might have some leftover – but that’s not really a bad thing, is it?
The same goes for the pickled red onions – it would be silly not to make a slightly larger batch while you’re at it, but of course, you can adjust the amount if you wish. Pickled red onions can last for several weeks in the fridge and are such a lovely and versatile side that you’ll definitely use them all!
Ingredients
Hamburger Patties
- 400 gram Ground Beef 8-12%
- Flake Salt to taste
- Pepper from the grinder - to taste
Truffle Mayo
- 1 Egg Yolk
- 3 gram Salt
- 5 gram White Wine Vinegar
- 45 gram Truffle Oil olive oil with truffle pieces, not essence
- Lemon Juice to taste
- White pepper to taste
- Salt to taste
Crispy bacon
- 4 slices Bacon
Crispy red cabbage
- 40 gram Red Cabbage
- Water
- Ice Cubes
Pickled red onions
- 4 Red Onion "regular" size
- 170 gram Sugar
- 200 gram Water
- 200 gram Apple Cider Vinegar or other vinegar
- 5 Peppercorns
- 1.5 Bay Leaf
Serving
- 34 gram Ketchup
Instructions
Beef patties
- Take the minced beef out of the fridge 30 minutes in advance.
- Divide the meat into two equal pieces.
- Press the first piece of meat together a few times in your hands to compact the meat.
- Roll the meat into a ball between your palms.
- Place the ball on a cutting board.
- Use one palm to press the patty flat while the opposite palm supports/presses the edges all the way around until you have an even patty about 2 centimeters thick.
- Repeat with the second piece of meat.
- Find a suitably sized pan.
- Place the pan on the stove and heat at medium-high. Our stove ranges from 1-14, and I set it at 12. Note that it is not necessary to add fat to the pan.
- Place the patties on the hot pan.
- Cook the patties for 3 minutes on each side.
- Transfer the finished patties to a cutting board and sprinkle with salt and pepper.
- Cover the patties with a clean towel and let them rest for a few minutes.
 Take all ingredients out of the fridge, measure them, and let them sit for 30-45 minutes so everything is at the same temperature when we begin.
- Take a bowl.
- Put the egg yolk in the bowl.
- Add salt.
- Whisk the egg yolk until it becomes sticky.
- Add the white wine vinegar while continuing to whisk.
- Then add the truffle oil in a thin stream. Continue until you reach your desired thickness.
- Adjust the taste with lemon juice, salt, and pepper.
- If you don't venture into making your own homemade bacon but instead buy the pre-sliced bacon from the supermarket, it's of course not an obstacle to getting delicious and crispy bacon in your burger. Here, I'll guide you on how to make bacon both in the oven and in a pan.
- In the oven
- Preheat the oven to 200 degrees Celsius (392 degrees Fahrenheit) (fan) or 220 degrees Celsius (428 degrees Fahrenheit) (regular).
- Start by opening the package of sliced bacon.
- Take a baking sheet, line it with parchment paper, and place the bacon slices on it. You can either lay the long pieces side by side without overlapping or arrange them in a circle that fits your bun.
- Place another piece of parchment paper on top of the bacon.
- Place the baking sheet in the preheated oven.
- Let the bacon cook for 10-12 minutes or until they have the desired color. Remember to keep an eye on them so they don't overcook.
- Take the baking sheet out of the oven and place the finished, crispy bacon on a couple of pieces of paper towel.
- In the pan
- Find a suitably sized pan.
- Place the bacon slices in the pan, side by side, without overlapping. No additional fat is needed for the pan.
- Place the pan on the stove and heat on medium. The bacon should cook slowly. If the pan heats up too quickly, the bacon is more likely to curl.
- Cook the bacon for 4-5 minutes on each side. If the bacon releases a lot of fat, it's a good idea to drain it periodically. You can use a tablespoon to remove the fat; avoid pouring it down the drain—dispose of it in the trash instead.
- Transfer the finished, crispy bacon from the pan to a couple of pieces of paper towel.
- Fill a bowl with water and ice cubes. The water should be ice cold.
- Finely slice the red cabbage on the cutting board.
- Place the red cabbage in the bowl with the ice-cold water.
- Let it sit for at least 20 minutes. Alternatively, you can place the bowl in the fridge for up to a day to get extra crispy red cabbage.
- Remove the red cabbage from the water and pat it dry with a towel.
- Start by scalding a jar with a locking lid. You can also rinse it with preservative afterwards to extend the pickled red onions' shelf life.
- Trim the ends of the onions and peel them.
- Halve the onions and slice them lengthwise into thin slices.
- Take a pot.
- Combine water, apple cider vinegar, and sugar in the pot.
- Bring to a boil.
- Add the peppercorns and bay leaves.
- Add the onions to the pot.
- Let them boil in the brine for 3 minutes.
- Remove the finished onions from the brine and place them in the jar. Do not turn off the stove.
- Let the brine boil further without the onions for another 2 to 4 minutes.
- Pour the brine into the jar to cover the onions. Let it cool slightly before sealing with the lid.
- Store the jar in the fridge and let the onions marinate for 1 to 7 days before using.
- Buns are always available in my freezer because we always make large batches. You can actually use any type of bun, even store-bought ones, but the burger will surely be extra delicious if made with a homemade, real burger bun. For example, you can bake the popular brioche buns or these soft burger buns.
- Take the frozen buns out of the freezer in the morning.
- Cut the buns in half.
- Place them on the toaster with the cut side down and toast them for a few minutes. This prevents the bread from soaking up all the dressing and ketchup.
- Flip the buns and toast them for another 30 seconds on the other side. They should just be warmed on the outside.
- Spread truffle mayo on the bottom bun and ketchup on the top bun.
- Place the patty on the truffle mayo.
- Then add the crispy bacon, pickled red onions, and crispy red cabbage on top of the patty.
- Finally, place the top bun on top.
- Serve.

 Take all ingredients out of the fridge, measure them, and let them sit for 30-45 minutes so everything is at the same temperature when we begin.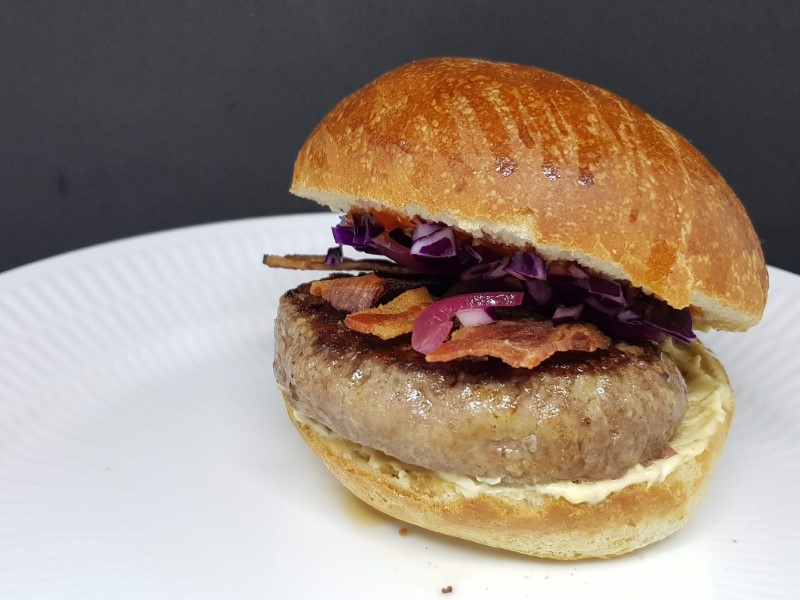
Notes
Watch a teaser for our video where we make the burger bun here:
In GastroFun PREMIUM you can of course watch the entire video. If you don't have access yet, you can sign up here.