
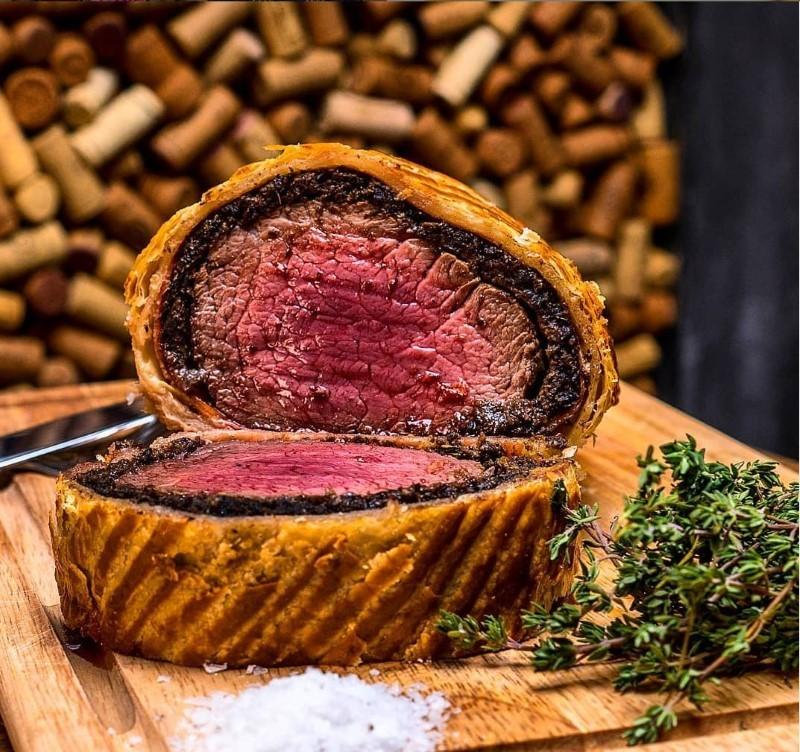

At my restaurant Feed Bistro, we have the signature dish Beef Wellington. It is important to follow the recipe in the order I present because especially the mushrooms need to sit for a while and become dehydrated.
Recipe for beef wellington
At my restaurant Feed Bistro, our signature dish is a Beef Wellington.
Here, I will demonstrate my method for a perfect Wellington – every time.
It is essential to follow the recipe in the order I present it, as the mushrooms, in particular, need to sit for a while to become dehydrated.
Follow the recipe and technique step by step, so you can impress your guests with a perfectly medium-rare Beef Wellington yourself.
Servings: people
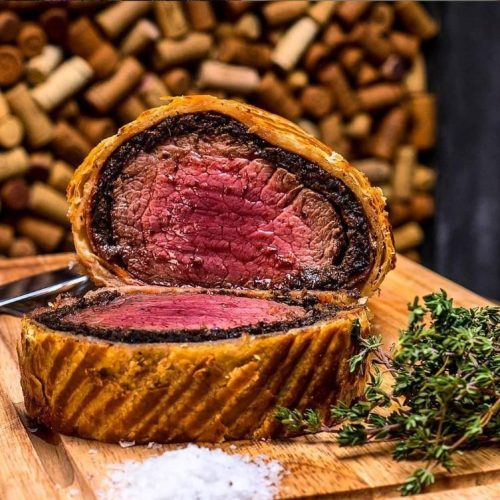
Beef Wellington
At my restaurant Feed Bistro, we have the signature dish Beef Wellington. It is important to follow the recipe in the order I present because especially the mushrooms need to sit for a while and become dehydrated.
Ingredients
Mushroom Paste/svampepuré
- 3 cloves Garlic
- 4 sprigs fresh rosemary
- 500 gram Mushrooms E.g. oyster mushrooms and champignons
- Salt
- Pepper
Beef Tenderloin
- 700 gram Beef Tenderloin
- Salt and Pepper
- Oil for the searing
- 20 gram Butter approx. Can be omitted
- 2 sprigs fresh rosemary Can be omitted
- 1 whole Garlic split lengthwise. Can be omitted
- 45 gram Mustard approx. I use English mustard - you can just as well use Dijon
Samling af din Wellington
- 6-8 slices Parma Ham
- 1 package Puff Pastry store-bought or make it yourself
- Egg Yolk both to assemble it inside and for brushing.
Instructions
Mushroom Paste
- All ingredients should be blended together:
- Peel the garlic and add it to the blender.
- Pick the leaves off your rosemary stems and add them to the blender.
- Chop the mushrooms into coarse chunks (if using oyster mushrooms, the process takes a bit longer as they contain a lot of moisture) and add them to the blender.
- Blend everything into a fine paste.
- The mixture will turn dark and may not look very appetizing, but it has an amazing flavor.
- Put the mixture in a reasonably hot pan to start frying it.
- Add salt and pepper to the mixture. Use a lot of pepper and only a little salt, as there will be Parma ham around the mushrooms later which gives a quite salty flavor.
- The mushroom paste should sit in the pan for 30-45 minutes until it is completely dehydrated.
- Stir it regularly.
Beef Tenderloin
- I always use a whole beef tenderloin for my Beef Wellington:
- I trim the tendons/membranes and use only the middle section, as it is the most uniform part. You can use other parts than the middle section, but I use the rest for a delicious pasta dish or tartare.
- Season the meat with salt and pepper on all sides.
- Put the meat in a nicely heated pan with oil.
- Sear it for about 1 minute on each side, this is only for the flavor/crust.
- If you want to go the extra mile, add a bit of butter, a split garlic bulb, and two sprigs of rosemary to the pan and use a spoon to baste the meat with the hot butter.
- In total, I give it about 4-5 minutes on high heat, with the last roughly 2 minutes with butter, garlic, and rosemary.
- Take the meat off the pan and let it rest for 5 minutes on a plate.
- Next, the meat needs to be coated in mustard. I almost always use English mustard as it's a little sweeter. If I use Dijon mustard, I mix it with a bit of brown sugar to make it sweeter.
- Brush the meat with mustard, making sure it has more than enough. This adds a really delicious flavor to the meat.
- Then put the meat in the fridge for about 30 minutes. It doesn't have to go in the fridge, but it's easier to work with when it has a bit more structure as it sets much better after being chilled a bit.
Assembling Your Wellington
- Now we come to one of the trickiest elements of the dish, and this is an all-or-nothing moment. If you don't do this part well enough, this dish is guaranteed to mess up.
- Place cling film on the kitchen counter and lay 6-8 slices of Parma ham on it (depending on the size of your meat).
- I typically place them side by side and they should overlap. Here, I've used 4 slices with 2 on each side.
- Spread the mushroom paste over the ham using a spatula to smooth it out evenly. It shouldn't reach the edges of the ham, there should be about a 2-3 cm ham edge all the way around.
- Place the meat in the center lengthwise.
- Now it's time to roll, and this is where technique comes into play.
- It is important to do it tightly and neatly.
- Lift the cling film and roll the ham part completely over the meat. Then release the film.
- It is important that it goes all the way around the meat.
- Seal the ham at the sides and roll it a quarter turn so the "seam" is underneath.
- Use the film again to press the sides in and wrap it completely around once more.
- Now roll the entire roll while holding the sides in tightly.
- Use a new piece of film and roll it as tightly as you can twice.
- Then it just needs to go back into the fridge for about 30 minutes so the meat becomes nicely structured and is much easier to work with.
- Carefully remove the cling film from the puff pastry.
- Place your puff pastry on a piece of baking paper on the counter.
- If your puff pastry isn't wide enough for the meat, roll it out a bit with a rolling pin.
- My best tip before you start working with the puff pastry is to round off the corners. You can work with a square piece (and most people do), but I find rounding the corners is better.
- Brush all around with egg yolks and place the meat on the puff pastry.
- Use the baking paper to lift the puff pastry over the meat and wrap it all the way around.
- Seal the corners by pressing them flat and pushing them inward. If you hadn't removed the corners, you would have a lot of excess puff pastry here.
- Take the roll off the baking paper and place it on a roll of cling film.
- Roll it tightly and put it back in the fridge.
- This whole process can actually be done the day before if you want more time to entertain your guests on the day.
- When the meat is to be cooked, it is crucial that it goes onto a hot tray. You risk the bottom becoming "soggy" (not crisp), and it is important for a Wellington to be crisp all the way around.
- Put a tray in a preheated oven at 190 degrees Celsius (374 degrees Fahrenheit) with convection.
- Brush all the puff pastry with egg yolks - including the ends.
- Now for the final cosmetic touch: I use a fork to create ridges all the way around, and finally, I sprinkle coarse salt on top.
- Take the hot tray out of the oven and spray a little oil on top so the meat doesn't stick.
- Place the meat on the hot tray and get a meat thermometer ready.
- Insert the thermometer from the end, and it's important to hit the center.
- Put your Wellington in the oven and it should take about 20-25 minutes. This depends a bit on how cold your fridge is.
- When the meat has a core temperature of 40 degrees Celsius (104 degrees Fahrenheit) (if you like it medium rare), take it out of the oven and let it rest (uncovered) for 10 minutes. Remove it from the tray so it doesn't continue cooking.
- It will end up at 48-50 degrees Celsius (118-122 degrees Fahrenheit), and then it is ready.
- Here comes the moment of truth:
- Slice the meat with a bread knife into 2-3 cm thick slices and serve, e.g., with a squash purée.
Notes
https://www.youtube.com/watch?v=Hu5wpo1Iz5Q&t