



Recipe for homemade nachos
Ay, Caramba! Now it’s time for Tex-Mex with a twist: Homemade nachos with leftover pulled pork. And yes, who doesn’t love nachos?
Traditionally, nachos consist of warm corn/tortilla chips covered with melted cheese or a cheese sauce and jalapeños.
The dish was reportedly created just south of the Mexican-American border in 1943 by restaurant owner, Ignacio Anaya. It was after working hours, and the cook had gone home, so when a group of American soldiers’ wives showed up at the restaurant, Ignacio had to act quickly.
He used what was readily available in the kitchen: Soft tortillas, which he cut into triangles and threw in the fryer, topped with cheese and slices of jalapeños. He put the whole delight in the oven.
The women were pleased and asked Ignacio for the name of the dish. Ignacio’s nickname was “Nacho,” so he replied that it was Nacho’s especiales (Spanish for “Nacho’s special”) – and thus the dish actually became his specialty. Over time, the dish’s name was shortened to “Nachos.”
– and as is often the case with well-known dishes, there are naturally multiple versions of the background story. Nonetheless, nachos have become super popular, both as a snack and an actual meal.
Today, it is a true café classic, often served with chicken. I had some leftover pulled pork, which I decided to use. You can of course just swap it with chicken if that’s what you prefer and have on hand, but you can also easily use, for example, ground beef.
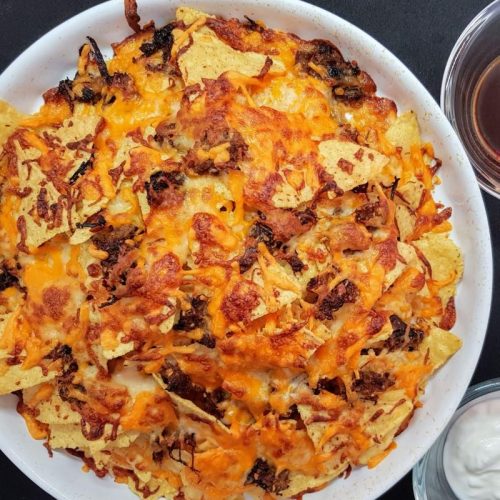
Homemade Nachos
Equipment
- Oven
- Bowl
- Ovenproof dish
Ingredients
- Tortilla Chips I used a large bag
- 150 gram Pulled Pork cooked - can be substituted with chicken or other cooked meat
- 100 gram Mozzarella Chees grated
- 100 gram Cheddar cheese grated
Instructions
- Preheat the oven to 200°C fan.
- Find a bowl.
- Put grated mozzarella and grated cheddar in the bowl.
- Mix it together.
- Take an ovenproof dish.
- Open the bag of tortilla chips. First, pour a third of the chips into the dish in one layer. We distribute the ingredients in 3 layers, so there is meat and cheese all the way through. Then distribute a third of your chosen meat on top of the chips.
- Finish with a third of the grated cheese.
- Repeat the process and add another layer of chips, meat, and cheese:
- And finish with a third layer of the remaining chips, meat, and cheese.
- Put the dish in the oven. Since the meat is pre-cooked, it's just about melting the cheese well. The time depends on your oven, but it takes about 15-20 minutes. Keep an eye on the cheese during the process.
- Take the finished nachos out of the oven.
- Serve immediately, for example with guacamole, salsa, and sour cream.
Notes
If you use raw chicken, for example, chicken breast fillets, you can start by placing the whole breasts in the pan and cooking them - they should not be fully cooked, as they risk becoming dry after the trip in the oven. Let them remain slightly pink in the center. Then shred the breasts using two forks and distribute the strips over the chips before placing them in the oven.
If you want to add jalapeños or olives, or both, just include them in the layers before putting it in the oven.