


Recipe for sourdough pot bread
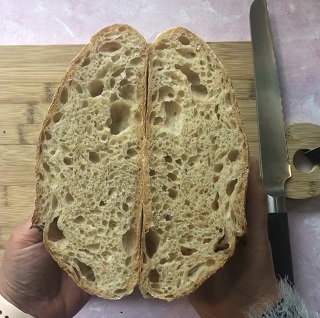
Crispy, airy, and delicious sourdough bread.
Perfect for all meals, even the small ones.
Serve it with a warm stew, as a side for tapas, or with a slice of cheese and jam for breakfast.
It is also suitable for toasts, croutons, breadcrumbs, etc., when the bread becomes a bit stale after a few days.
A sourdough bread requires patience, technique, and understanding
It may sound harder than it is, and for some, it will be harder than it sounds.
In principle, sourdough is a leavening agent like yeast – they work in the same way.
One is wild yeast that works slowly, and the other is conventional yeast that works quickly.
Sourdough recipes are guidelines.
It depends on the types of flour, the freshness of the flour, the temperature in the kitchen, the activity of the sourdough, handling, etc.
What works in my kitchen might not work in yours.
It may take a few tries to hit the right timeline.
Make notes and bake a lot of bread 🙂

Equipment
- Kitchen Scale
- Stand Mixer
- Bowl
- Pot
- Baking Paper
- Cutting Board
- Oven
Ingredients
- 165 gram Sourdough
- 350 gram Water
- 400 gram Manitoba Flour Steel Milled
- 100 gram Øland Wheat Flour Stone Ground
- 16 gram Salt
Instructions
Recipe for a round pot bread with 75% hydration.
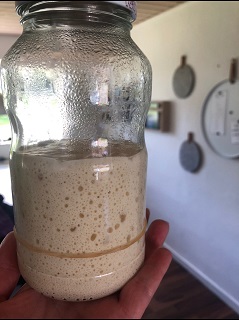
- Start by feeding your sourdough starter, place a rubber band around it, and wait for your starter to double. This takes about 3-5 hours.
- 33g sourdough starter
- 66g flour
- 66g lukewarm water

Fermentolyse
- When your starter is ready, take out your stand mixer.
- You can also use your hands, but it requires more effort.
- Weigh all ingredients except for the salt.
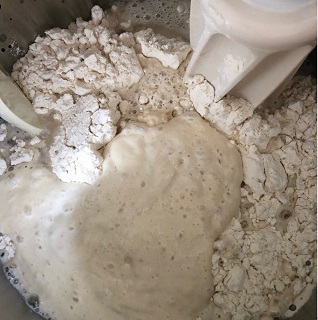
- Mix your doubled starter, flour, and water.

- Stir together until there is no dry flour left. Do not knead the dough.
- Let the dough rest and undergo fermentolyse.
- This basically means that your dough needs to rest.
- While it rests, the enzymes in the flour activate, making the dough elastic and developing gluten.
- If you only mix water and flour, it's called autolyse.
- When you fermentolyse, you start your dough immediately.
- Let the dough fermentolyse for 2 hours, covered with cling film.
Kneading
- After 2 hours, add salt to the dough.
- Now the dough needs to be well kneaded.
- If hand-kneading, I recommend Gérard Rubaud's "Rubaud Method" or Richard Bertinet's "Slap and Fold".
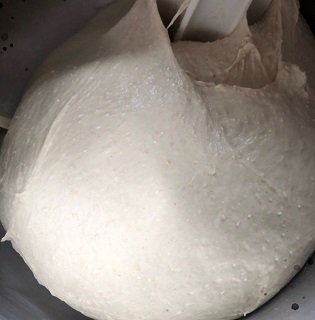
- When using a machine, knead the dough until it becomes glossy and cohesive. This takes about 5-7 minutes on my Ankarsrum on setting 4.

- You can perform a gluten test while your dough is kneading to see when it's ready.
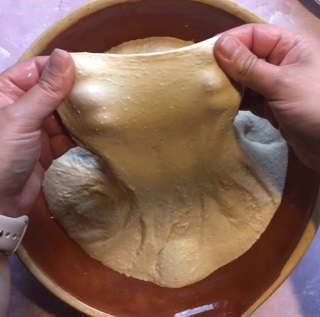
- With wet fingers, grab the dough and stretch it. The dough should be elastic and pliable.
- People say you should be able to read a newspaper through the gluten window, but you don't need to stretch the dough that thin.

- When the dough is stretchable and has come together into an elastic mass, stop kneading.
- Less is better than too much.
- An over-kneaded dough has broken gluten and no strength left.
- Let the dough rest for 30 minutes, covered with cling film.
Folding
- Do Stretch and Folds - with slightly damp hands, lift and stretch the dough over itself.
- Do this all the way around.
- Let the dough rest for 30 minutes, covered with cling film.
- Do Stretch and Folds again.
- Let the dough rest for 30 minutes, covered with cling film.
- Do Coil Folds - with slightly damp hands, lift under the dough and tuck it under itself.
- Let the dough rest for 30 minutes, covered with cling film.
- Do Coil Folds again.
- Let the dough rest for 2 hours, covered with cling film. (this is where you can adjust the time, shorter or longer)
- Your dough should have increased by 30-50% in total from when you started folding it.
- Fold in a transparent container and mark it - so you can monitor the progress.
- Your dough should also have surface activity, like small bubbles.
Pre-shape
- With slightly damp hands, pour the dough out onto the kitchen counter.
- Stretch the dough into a rectangle and fold it 1/3 over itself.
- Now fold the left side over, the right side, and the bottom up.
- Kind of like an envelope.
- Turn the dough over, so the folds are against the counter.
- Shape the dough by pulling it across the counter toward you - a little from all sides.
- Cover the dough ball with a bowl.
- You have now pre-shaped your dough.
- Let it rest for 30 minutes.
Final Shape
- With slightly damp hands, shape the dough further.
- Either by repeating the above steps or pulling the dough across the counter to tighten it more.
- You have now final shaped your dough.
- Dust your proofing basket with rice flour, or use a bowl with a towel. Use a basket or bowl where your dough can rise upwards and not outwards.
- You don't need to use rice flour, but your flour should be gluten-free.
- Gluten-containing flour sticks, and then the dough you've worked so hard on will stick.
- Place your dough in the basket with the bottom up. Dust with a little rice flour and cover the basket - either with a pot lid, plastic, or a towel.
- Place your dough in the fridge for 12-18 hours.
Baking
- Place the rack at the bottom of your oven, put your pot inside, and preheat to 240 degrees Celsius (464 degrees Fahrenheit) with fan.
- Let the pot heat up for about 30 minutes.
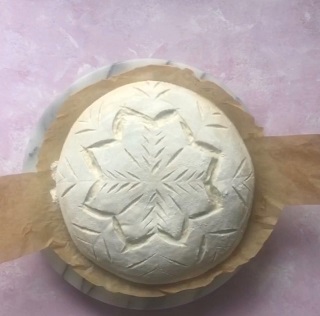
- Take your dough out of the fridge and place a piece of parchment paper on top and then a cutting board (you can cut the parchment paper into a circle with two tabs, so you can easily lower it into the pot)
- Turn the dough over and remove the basket.
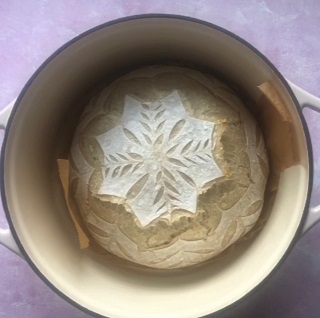
- Dust with a bit of rice flour and score your desired pattern.

- Take the pot out of the oven, lower your bread into it, put the lid on, and bake for 30 minutes in the oven.
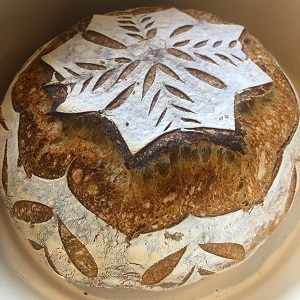
- After 30 minutes, remove the lid from the pot, place it back in the oven, and bake for about 15 minutes or until the bread has the desired color.


- If you want to measure the temperature of the bread, it should be about 97-98 degrees Celsius (207-208 degrees Fahrenheit).
- Wait a bit before cutting the bread to avoid squashing the structure when slicing it.
- You have now baked your delicious sourdough bread, and the first thing you do is get the cold butter from the fridge and enjoy a few well-deserved slices. After all, you've just spent nearly 24 hours on your bread 😉
- Bon appétit!
Notes
Tip:
If your bread hasn't risen in the fridge or is a rubbery bread with a dense/firm/sticky crumb, your starter wasn't ready, or it didn't rise long enough before refrigeration. Your bread is under-fermented.If there are large visible bubbles in your dough when you take it out of the fridge, your dough was too active overnight - and you should cut down on the time before refrigeration. It will be soft and difficult to score, but great for rolls.
If your dough spreads out when you turn it out of the proofing basket and splats when you score it, your dough is over-fermented.