Servings: people
Rainbow Cake
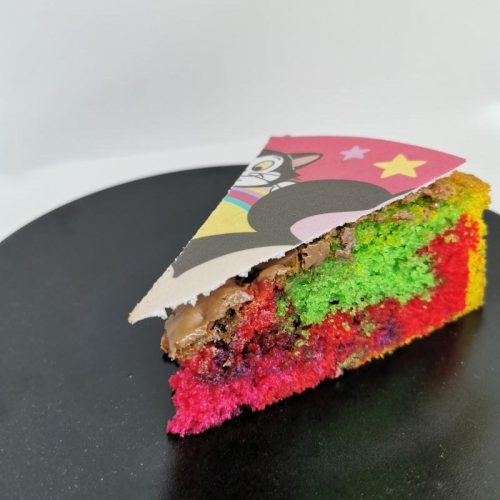
As a teenager, I often baked pound cake! My daughter is simply so fascinated by rainbows, which gave me the idea for this rainbow cake made from pound cake.
Ingredients
Shortbread
- 160 gram Wheat Flour
- 255 gram Sugar
- 200 gram Butter very soft
- 4 Egg
- 10 gram Baking Soda
- 8 gram Vanilla Sugar
- 10 gram Lemon Juice
- 1 pinch Salt
- Paste Color e.g., green, yellow, red, purple, and pink
- Butter for the springform pan
- Sugar for the springform pan
Topping
- 50 gram Milk Chocolate melted
- Cake Decoration e.g., a design on rice paper
Instructions
Pound Cake
- Take the butter out of the fridge in good time so it becomes very soft.
- Pour sugar and the soft butter into a bowl and whisk together with an electric mixer.
- Then add one egg at a time while still whisking. The batter now becomes more and more airy.
- Now add all the remaining ingredients (except the food coloring) and mix thoroughly. Find four clean bowls and divide the cake batter so you have five equal portions.
- Use the food colors to dye each portion a different color.
- Grease your springform pan with butter. My springform pan is 24 centimeters in diameter.
- Sprinkle the edges of the springform pan with sugar.
- Pour each portion of cake batter into the springform pan one by one as shown in the video above.
- Preheat the oven to 180 degrees Celsius (356 degrees Fahrenheit) with convection. Bake your rainbow cake in the preheated oven for 40 minutes. The time depends on your oven, but you can check if the cake is done by inserting a skewer or meat needle into the cake. There should not be any cake batter on the stick when you pull it out of the cake.
- Remove the finished cake from the oven and let it cool.
Topping
- Pour melted chocolate on top of the cooled cake and place the rice paper decoration on top. The melted chocolate helps keep the rice paper in place, so the chocolate should not harden beforehand.
- Serve!
- Enjoy.