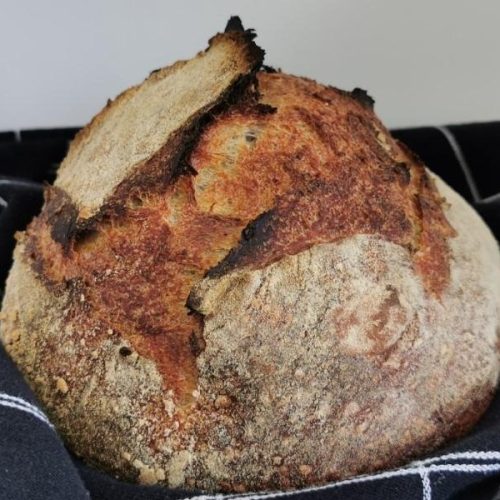
Ingredients
Day 1, Fordejen
- 10 gram Fine Salt
- 436 gram Wheat Flour
- 24 gram Whole Wheat Flour
- 290 gram Water lukewarm
Day 2.
- 50 gram Sourdough
- 50 gram Rice Flour to sprinkle the proofing basket
Instructions
Day 1, The Pre-Dough
- Mix water, salt, wheat flour, and rye flour in a large bowl and knead well until the dough stops sticking to the sides of the bowl. The dough should be smooth and not sticky. If the dough sticks to your fingers, add an extra tablespoon of wheat flour.
- Transfer the kneaded dough to a clean bowl with a lid or use a shower cap or cling film to cover the bowl. Place the bowl with the pre-dough in the fridge overnight.
Day 2, Morning.
- When your sourdough starter is ready after the last feeding (the evening before), place 50 grams of sourdough starter on top of the pre-dough. Gently knead the sourdough starter into the bread dough (see the video below).
- Fold the dough over itself around the sourdough starter. Gently knead the dough without knocking the air out of it.
- Roll the dough around the edge of the bowl into a tight ball; this technique takes a bit of practice but comes with time.
- Even if the technique isn't quite there, my bread turned out fantastic.
- This part takes at least 10 minutes, and preferably 30 minutes. But you have to experiment a bit here.
- Transfer the dough to a clean bowl and let it rest at room temperature for 2 hours.
- First stretch and fold:
- Carefully loosen the edges of the dough from the bowl, and with slightly damp hands, stretch and fold the four sides over the dough, one by one.
- Let the dough rest in the bowl again at room temperature for 2 hours.
- Second stretch and fold:
- Repeat the stretching and folding from the first time and let the dough rest again for 2 hours.
- Third stretch and fold:
- Carefully loosen the dough from the bowl. While the dough is still in the bowl, stretch and fold the four sides again before turning the dough out onto the work surface with the seam down. Gently roll the dough into a tight ball using your hand and a dough scraper.
- Let the tightly rolled ball rest for an hour on the counter so the dough forms a crust.
- Last fold:
- Turn the dough over and stretch and fold it again just like the previous times.
- Turn the dough over again so the folds face down on the counter. Once more, gently roll the dough into a tight ball without knocking out the air. You should be able to see small air bubbles on the surface of the dough, and we need to preserve these.
- Place the dough into a lined proofing basket dusted with rice flour. Turn the dough so the seam faces up since this will be turned down when the dough is placed in your cast iron pot or Dutch oven.
- Let the dough rest for 2-4 hours at room temperature.
- Place the cast iron pot in the oven while it heats up to 260 degrees Celsius (500 degrees Fahrenheit) with convection.
- Once the oven and pot are well heated, carefully transfer the dough into the pot without burning your fingers. In other words, be careful, it's hot. Make a few deep cuts in the bread with a knife before putting the lid back on the pot and returning it to the oven.
- Bake the bread for 20 minutes with the lid on. Then remove the lid and bake the bread for an additional 20 minutes without the lid.
- When the bread is fully baked, turn it out onto a cooling rack.
- Let the bread cool completely before slicing.
Notes
Next time I bake, I will try lowering the oven temperature to 230 degrees Celsius (446 degrees Fahrenheit) with convection, once the bread is in the oven.
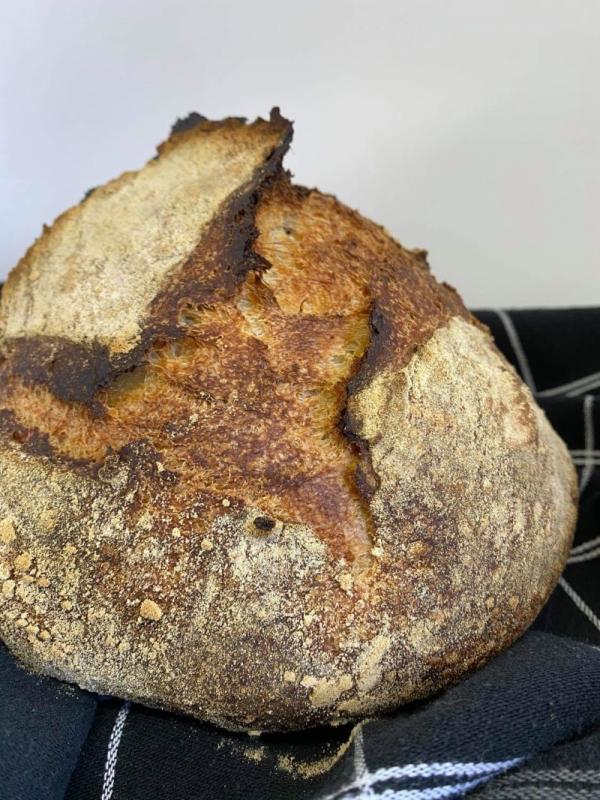
I felt the bottom of the bread was slightly overdone; it was still edible, but a slightly lower temperature might give a better result.
This is the first time my sourdough bread has truly succeeded, and I can hardly contain my excitement.
On previous attempts at baking with sourdough, the flavor was okay, but the bread was very flat unless I cheated and added a bit of yeast.
But with this recipe, it just worked, and now it's time to experiment with sourdough bread. This recipe has given me the confidence to keep trying.
And who knows, maybe I can also succeed in baking the perfect sourdough on a baking steel, with steam and everything.
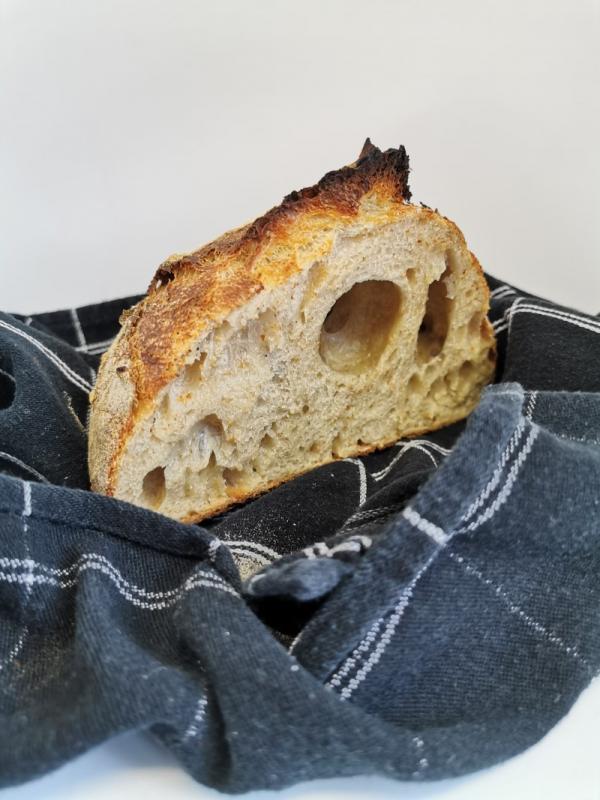
The bread tasted amazing and the crumb was delightful.
I felt the bottom of the bread was slightly overdone; it was still edible, but a slightly lower temperature might give a better result.
This is the first time my sourdough bread has truly succeeded, and I can hardly contain my excitement.
On previous attempts at baking with sourdough, the flavor was okay, but the bread was very flat unless I cheated and added a bit of yeast.
But with this recipe, it just worked, and now it's time to experiment with sourdough bread. This recipe has given me the confidence to keep trying.
And who knows, maybe I can also succeed in baking the perfect sourdough on a baking steel, with steam and everything.
The bread tasted amazing and the crumb was delightful.