
Recipe for pad krapow gai
I generally love ALL Thai food (especially my mom’s own – she was born and raised in Thailand), and Pad Krapow is one of the great street food classics that I really adore.
Pad Krapow is quick, easy, and straightforward – and the dish instantly sends my thoughts to the exotic and warm climes: both the bustling, traffic-filled, crowded Bangkok and the small, charming street kitchens located far away from the city’s hustle and bustle.
The other evening, I invited my dad for dinner. We’ve just booked our flights for our next vacation: 3 weeks in Thailand! I am REALLY looking forward to diving into all the delicious Thai dishes, so to set the mood, I found it only fitting to serve up a classic from the Thai street kitchens: Pad Krapow.
I made Pad Krapow Gai, and “Gai” just means “chicken.”
It has its challenges to make a TRUE Pad Krapow (because it is made with holy basil), but luckily, you can make some small adjustments.
A traditional Pad Krapow typically consists of, among other things, minced chicken or pork, so-called snake beans (very long, green beans), chili, garlic, dark soy sauce, Thai soy sauce (a thin soy sauce), fish sauce, and, most importantly, holy basil.
It’s hard to find holy basil here, but if you visit an Asian supermarket, I recommend buying sweet Thai basil as a substitute – you can also find the long green snake beans there.
With a little goodwill, you can EASILY substitute with regular basil and fresh green beans from your “normal” supermarket – that’s what I did myself!
It’s just important that they are fresh green beans and not those classic frozen haricot verts. Fresh green beans taste FAR better, at least in wok dishes, because the beans should still have some crunch in the finished dish.
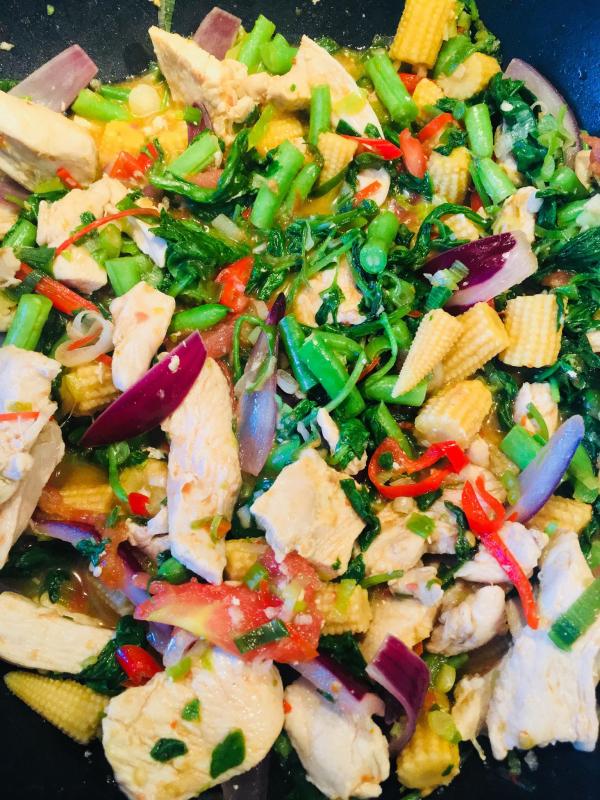
When I make “Thai food” – or rather Thai-inspired food – I always end up freestyling a lot and adding many other things, like baby corn, water chestnuts, and so on.
This time it included, among other things, baby corn, spring onions, bean sprouts, slices of fresh tomato, and baby spinach.
So this is not the completely traditional Pad Krapow, but Thai food is generally really hard to mess up – and it would probably only be a connoisseur who would comment on it.
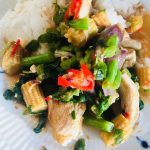
– And by the way, a Pad Krapow should, of course, be served with delicious, aromatic jasmine rice. You could also top the rice with a fried egg.
Next time, I will make the dish with either minced chicken or pork to make it a BIT more authentic, but this version tasted delightful nonetheless – and very Thai!
If you’re unsure how spicy you can “handle” your Pad Krapow, taste the chili first – there’s almost no other way. Chilies can really vary in strength, even if you buy the same type of “chili mix” from the supermarket again and again.

Ingredients
- 160 gram Jasmine Rice
- 450 gram Chicken Breast or minced
- 4 cloves Garlic
- 1 can Baby Corn
- 1 pcs. Red Onion
- 4 pcs. Chili chili mix from the supermarket.
- 100 gram Green beans fresh
- 2 pcs. Tomato
- 100 gram Baby Spinach
- 1 bunch Basil I used a whole pot
- 3 pcs. Scallion - Spring Onions
- 15 gram Soya
- 30 gram Fish Sauce
- 18 gram Oyster sauce
- 12 gram Cane Sugar or regular white
- 42 gram Oil neutral in flavor
Instructions
- Take the chicken out of the fridge. It benefits from not being fridge-cold when placed on a hot pan as the meat would otherwise release a lot of liquid and cause it to boil rather than fry.
- Put the rice in a pot and rinse it thoroughly with cold water. The water doesn't need to be completely clear, but you want to rinse out most of the "excess" starch.
- Fill the pot with fresh, cold water so that the rice is covered with about 2 centimeters of water.
- Cook the rice until tender on the stove. You can advantageously use a rice cooker, but a regular pot/saucepan is also fine. Set the finished rice aside and now start preparing all the ingredients for the wok. Everything needs to be prepped beforehand as there won't be much time to do it once we start cooking.
- Cut the green beans into pieces of 3 centimeters in length.
- Cut the tomatoes into thick wedges.
- Cut the spring onions into thin slices.
- Rinse the baby spinach and basil leaves.
- Cut the baby corn into 2 centimeter pieces.
- Peel the onion and cut it into thick wedges.
- Cut half of the chilies into thin, diagonal slices. It looks decorative in the finished dish.
- Roughly chop the remaining half of the chilies and place them in a mortar. You can also use a mini-chopper if you don't have a mortar. Cut the garlic into smaller slices and place them in the mortar as well.
- Give it a good grind in the mortar. It should become a fairly coarse mixture.
- Cut the chicken breasts into suitable pieces. I like to cut them into diagonal slices and possibly halve them if some pieces become too long. However, long, diagonal slices of chicken also look very decorative!
- Place your wok on the stove and turn the heat up to high. When the wok is hot, add the oil.
- Turn on the extractor fan and add the coarse chili/garlic mixture to the hot oil. Let it take on some color.
- Now add the meat to the pan and let it quickly gain some color.
- Then add soy sauce, fish sauce, oyster sauce, and sugar.
- Stir it well. Add tomatoes, green beans, spring onions, baby corn, red onion, and the thin chili slices.
- Let everything simmer for a bit while stirring.
- Add baby spinach and basil leaves.
- Stir and turn off the heat. Stir a few times while the leaves wilt from the heat. Serve with jasmine rice.