

What does 80% hydration mean?
If you’ve recently started baking your own bread, you’ve probably come across the term “hydration” at some point.
It might sound like something only professional bakers need to understand, but the concept is actually surprisingly simple.
Hydration refers to the amount of water in a dough compared to the amount of flour.
For example, if you use 500 grams of flour and 400 grams of water, the water weighs 80% as much as the flour.
That’s why a recipe using those proportions is described as having 80% hydration.
And if you’ve ever worked with dough containing that much water, you’ll know just how different it feels from ordinary bread dough.
It’s soft, sticky, and sometimes surprisingly difficult to handle.
But there’s a very good reason for all that extra moisture.
This particular sourdough recipe was developed after gradually moving away from traditional white bread and experimenting with wetter and wetter sourdough doughs.
As the amount of water increases, the dough begins to behave differently.
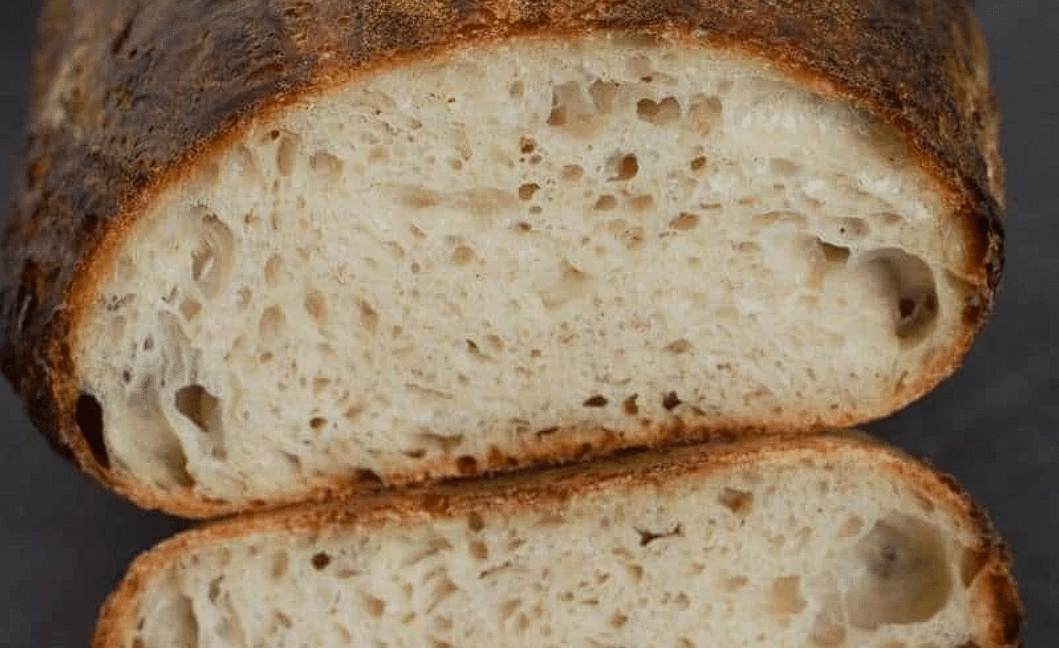
It becomes softer, stickier, and more challenging to shape. However, with the right technique, higher hydration can help create wonderfully moist bread with a lighter, more open crumb.
In other words, adding more water doesn’t simply make the dough wetter.
It changes the entire baking process.
More water means you need better technique
You might assume that adding more water would make bread dough easier to work with.
Unfortunately, it’s usually the opposite.
High-hydration sourdough can be challenging because it doesn’t behave like the firm, elastic dough many home bakers are familiar with.
That’s why this recipe uses several techniques to help develop strength and structure.
The process begins by combining 400 grams of water with 500 grams of flour.
The mixture is then allowed to rest in a process known as autolyse.
This resting period allows the flour to absorb the water and helps the dough begin developing its structure before the active sourdough starter is added.
Next comes the salt, followed by a longer mixing or kneading process.
Later, the dough goes through four rounds of stretching and folding, with an hour between each round.
These folds play an important role.
Rather than simply shaping the dough, they help strengthen its structure, allowing it to hold onto the gas produced during fermentation.
Without enough strength, a very wet dough can spread out rather than maintaining its shape.
Once the folding process is complete, the dough is gently shaped on the work surface and transferred to a proofing basket.
It then goes into the refrigerator overnight.
So while the extra water creates the potential for a lighter, more open crumb, it’s the technique that allows you to achieve that result.
Water alone won’t make a great loaf.
Higher hydration doesn’t always mean better bread
Once you start learning about hydration, it’s easy to become obsessed with increasing the percentage.
If 70% hydration makes good bread, surely 80% must be better?
And wouldn’t 90% be even more impressive?
Not necessarily.
A higher hydration percentage doesn’t automatically produce better sourdough bread.
Different types of flour absorb different amounts of water, and some flours can handle much wetter doughs than others.
The higher the hydration, the more demanding the dough generally becomes.
That’s why gradually increasing the water content is usually a much better approach than jumping straight into an extremely wet recipe.
As you become more comfortable stretching, folding, and shaping dough, you can begin experimenting with higher hydration levels.
Over time, you’ll develop a better understanding of how much water your particular flour and baking technique can handle.
This recipe is a great example of that process.
After the dough has spent the night in the refrigerator, it’s baked at a high temperature with steam during the first 20 minutes.
The steam helps keep the crust flexible during the initial stage of baking, allowing the loaf to expand.
The bread is then baked without steam, giving the crust a chance to develop its final texture.
And then comes what might be the hardest part of the entire recipe.
Waiting.
Ideally, the finished loaf should cool for one to two hours before you slice into it.
After spending two days preparing a homemade sourdough loaf, that final wait can feel surprisingly long.
But giving the bread enough time to cool helps the crumb set properly, making it easier to slice and giving you the best possible result.
So the next time you see a bread recipe mentioning 70%, 80%, or even higher hydration, you’ll know exactly what that number means.
And more importantly, you’ll understand why it matters.
Happy baking, and enjoy!
Frequently asked questions
What does hydration mean in bread dough?
Hydration describes the amount of water in a dough relative to the amount of flour. For example, 400 grams of water and 500 grams of flour equals 80% hydration when considering those two quantities alone.
Is higher hydration always better?
No. Higher hydration creates wetter dough that is often more difficult to handle. Different types of flour also absorb different amounts of water, so the ideal hydration depends on both the flour you’re using and your baking technique.
Why do you need to fold wet dough several times?
Stretching and folding helps develop and strengthen the dough’s structure. This is particularly important with wet sourdough dough, which can otherwise be difficult to shape and may struggle to hold its structure during fermentation.