

Clarified butter is regular butter with two things removed: the water and the milk solids. What you’re left with is almost pure butterfat, and that changes everything about how it behaves when the heat is on.
It’s still butter, but we’ve removed some of it
Regular butter is roughly 16-17% water and a smaller amount of milk proteins. That sounds like a small proportion, but those two components are exactly what cause butter to foam, sputter, and eventually burn when the pan gets hot.
Clarify the butter and you remove both. The result is a stable, clean fat that can handle heat that would blacken whole butter in seconds. That’s the whole trick, and it’s worth understanding before you try to sear a steak in butter or whisk together a bearnaise.
I think what’s exciting about clarified butter is that it’s not a specialty product you need to track down. It’s a simple process you make yourself from ordinary butter at home.
Why it shows up in the classic sauces
Personally, it’s bearnaise that makes clarified butter most interesting to me. Bearnaise is an emulsion: egg yolks suspended in fat, held together by heat and steady whisking. For that emulsion to stay stable, the fat needs to be pure. Whole butter introduces water into the equation, which can break the sauce.
Hollandaise has the same requirement. Both sauces call specifically for clarified butter because it gives the egg yolks exactly what they need – fat with nothing else to get in the way.
Beyond the classic French sauces, clarified butter is excellent for searing meat and vegetables. You get full butter flavor at the high temperatures needed for a real crust.
Read more: Homemade rhubarb jam with vanilla: 20 minutes, four ingredients, better than any jar
The easiest method: the bag-and-hang
This technique requires almost no active work. All you need is a sealable bag and two clips.
- Cut the butter into pieces and melt it in a saucepan over medium-high heat.
- Pour the melted butter into a zip-top bag.
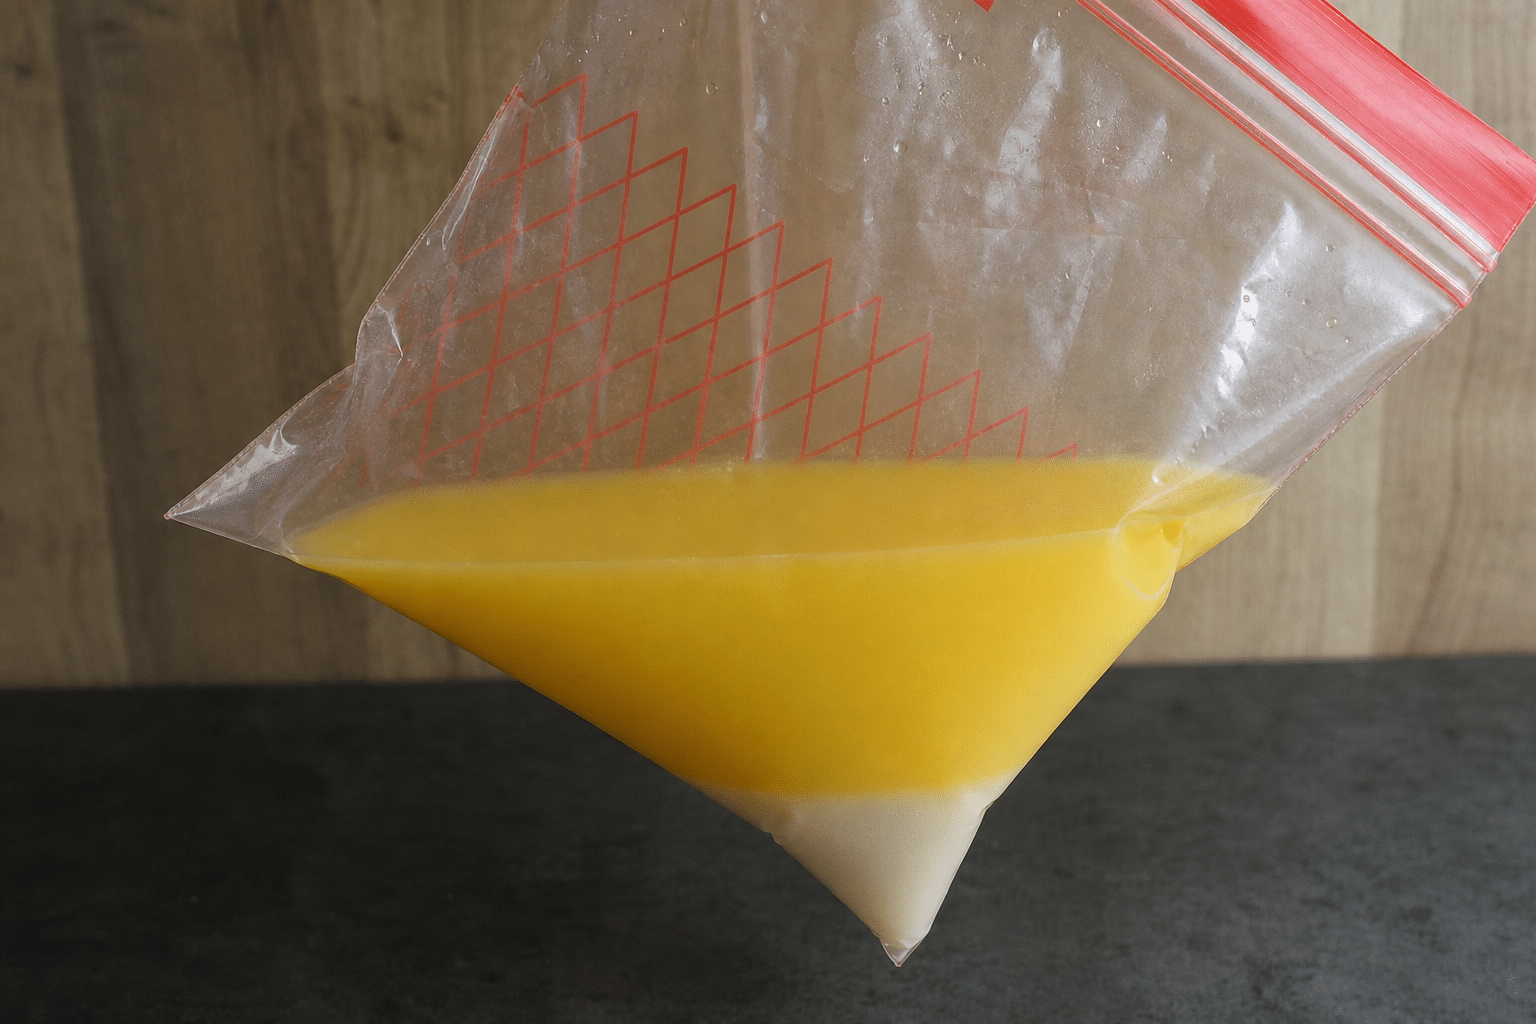
- Clip the bag to a refrigerator shelf at a diagonal angle – two clothespins or binder clips work perfectly. Set it so one corner points downward.
- Leave it in the fridge until fully firm, a few hours or overnight. As the butter solidifies, the watery whey sinks to the lower corner and the pure fat sets above it.
- Once firm, snip a small hole at the lower corner and drain off the liquid. Remove the solid clarified butter from the bag.
The active work is just minutes. The refrigerator does the separating.
Sous vide variation: Seal the butter in a vacuum bag and submerge it in a water bath set to around 158°F (70°C). Once fully melted, hang the bag diagonally in the refrigerator with clips, exactly as above. When firm, cut the lower corner to drain the whey.
Read more: Giouvetsi: the Greek one-pot where orzo pasta absorbs a rich braised meat sauce and comes out creamy
Clarified butter vs. ghee: not the same thing
Both start the same way, but ghee goes one step further. With clarified butter, the milk solids are removed as soon as they separate. With ghee, those same milk solids are allowed to cook on until they turn golden and nutty, then strained out.
The result is a richer, toasted flavor you’ll recognize from Indian cooking. Functionally, both behave similarly in a hot pan. The difference is taste: clarified butter is clean and neutral, ghee is deeper and more aromatic.
What to use it for
- Bearnaise and hollandaise. Both rely on pure fat for the emulsion to hold. If your sauce has broken or tasted watery, switching from whole butter to clarified butter often fixes it.
- Searing meat. High-heat butter flavor without the burn.
- Frying fish and eggs. The same logic, the same result.
- Pan sauces. Anywhere you want butter flavor at temperatures whole butter can’t take.